
School schedule
Publish each group's weekly schedule so families can see it on the portal and the app.
2026-09-13
Before you start
- Only directors can create and manage schedules. Educators do not have access.
- A schedule is stable for as long as it's valid: unlike the lunch menu, it does not rotate by week. You set the Monday-to-Friday time slots once and they stay the same while the schedule is valid.
- You can create several schedules at once. For example, a general schedule for the whole school and a different one restricted to a specific tag (a group, a classroom...): each family sees every schedule that applies to them.
- A schedule is only visible to families once it is published. While in draft, only you can see it.
- For families to see schedules on the portal and the app, the school needs to add the School schedule section to the portal menu. Check the Navigation menu page if you haven't activated it yet.
Step by step
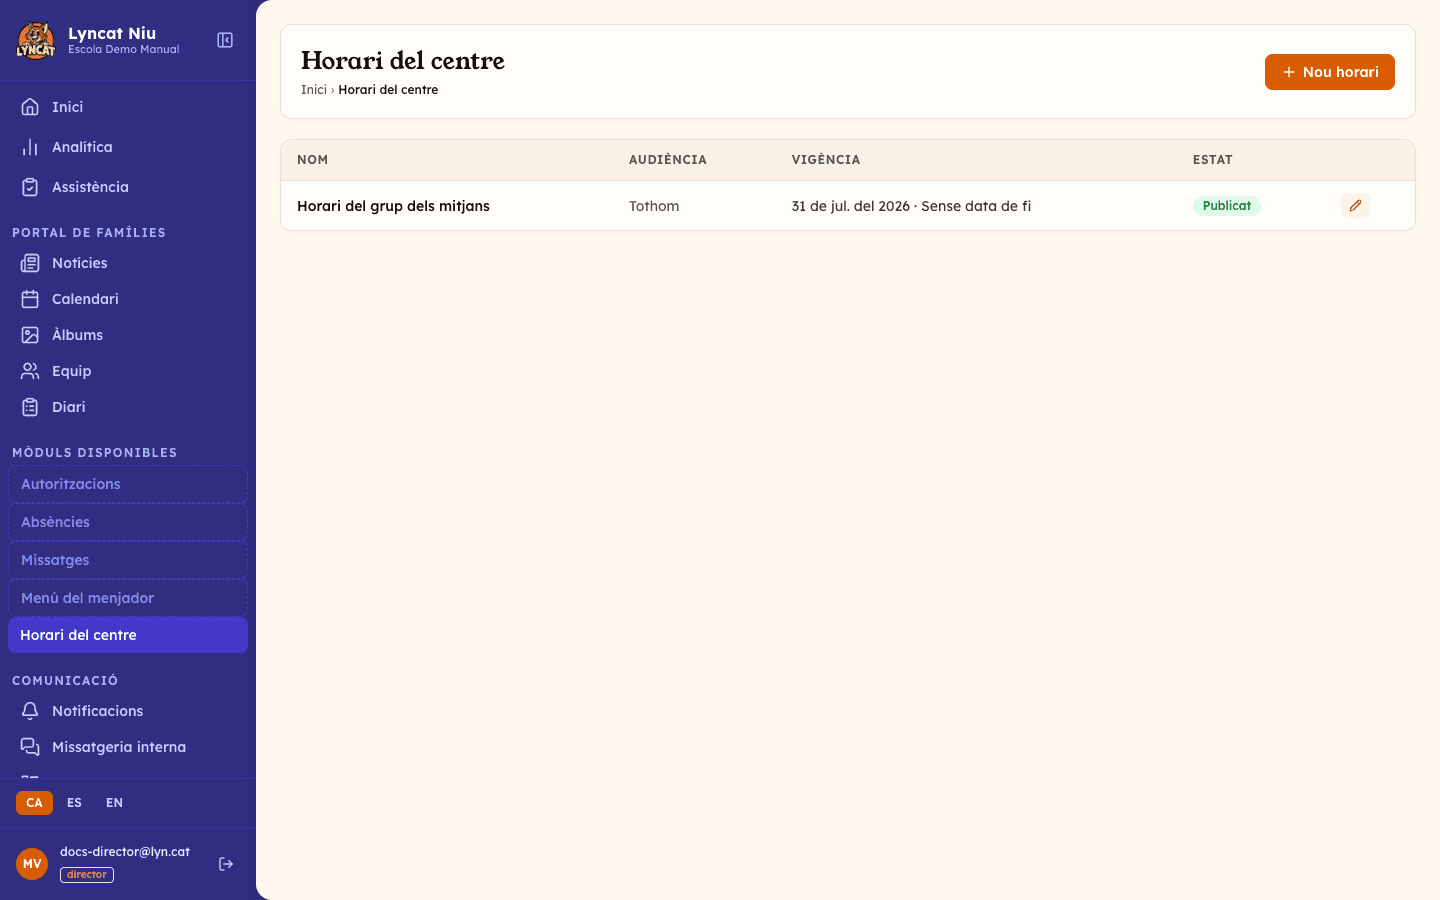
Open School schedule
In the dashboard, go to School schedule in the side menu. You'll see the list of schedules already created, with each one's name, audience, validity and status.
Create a new schedule
Click New schedule. The form with the schedule's details will open.
Enter the name and validity
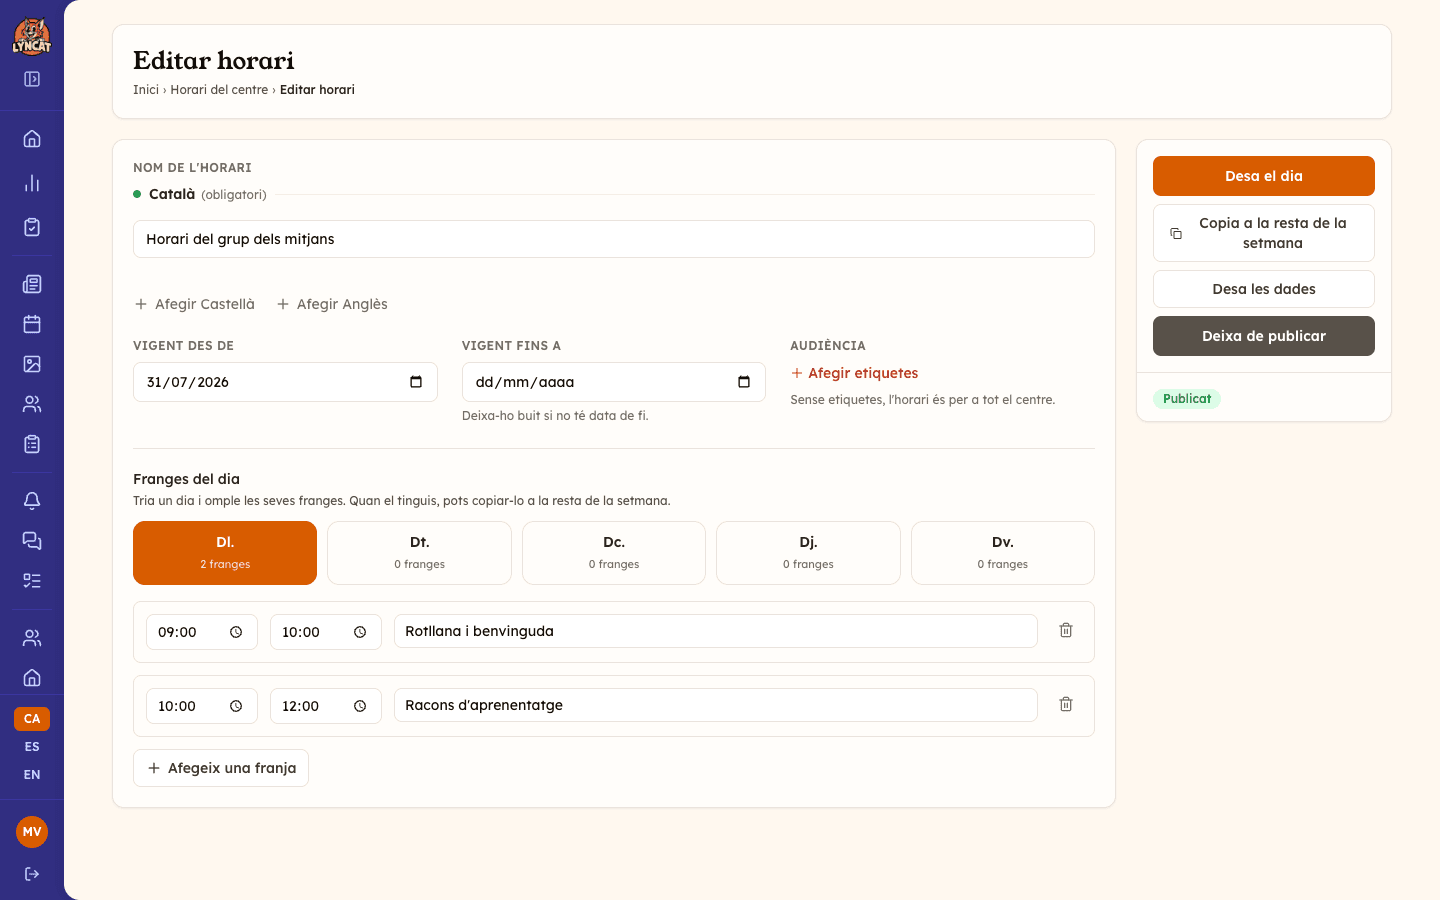
Enter the Schedule name (for example, "Middle group schedule"). You can add it in more than one language if the school's portal is multilingual.
Choose the Valid from date (required) and, optionally, a Valid to date. If you leave it empty, the schedule stays valid indefinitely.
Choose the audience (optional)
If you don't select any tag, the schedule is visible to the whole school. If you select one or more tags, only families of students with those tags will see it. This is useful, for example, to publish a different schedule for a specific group.
Fill in a day's time slots
Once the schedule is saved, you'll enter the editor. Select a day (Mon to Fri) using the pills at the top and click Add a time slot for each activity: start time, end time (optional) and the activity name. You can add as many as you need; they sort themselves by time.
When you're done with the day, click Save the day.
Repeat or copy to the rest of the week
If another day has the same time slots, select it and add them again, or save yourself the work: with the day already saved, click Copy to the rest of the week. You'll be asked to confirm before the other weekdays' time slots are replaced with this day's.
Publish or save as draft
Once the details and time slots are ready, click Publish so families see the schedule on the portal and the app. If you don't want it visible yet, leave it as a draft and publish it later from the same screen.
Truc
Click Save details whenever you change the name, validity or audience, regardless of whether you save a day's time slots. These are two separate actions.
Writing the schedule in several languages
Both the schedule name and each time slot's name can be written in the content languages your school has enabled under My account → Languages.
The right-hand side panel has the Translate into the centre's languages button: one click queues an AI task that fills in the schedule name and every time slot in the school languages that are still empty.
Important
The automatic translation never touches text you wrote yourself: it only fills in empty fields. The schedule needs text in the main language for the button to become available, and each translation uses part of your plan's AI task allowance.
Downloading the schedule as a PDF
The editor's right-hand side panel has a Download PDF button that produces an A4 page with the week's schedule and the school logo.
Before downloading it, choose the PDF Language. Only languages in which the schedule already has text can be selected; the rest appear disabled with the reason ("no content", or "unavailable" if we have no typeface for that script). The PDF opens in a new tab.
Important
The schedule only has a weekly version: unlike the lunch menu, you cannot download a PDF for a specific month.
What to do if...
The PDF won't generate and I get a content warning. If the schedule has too many time slots or the names are very long, it doesn't fit on one A4 page. Reduce the number of slots or shorten the names and try again. If the warning is about the logo, check it under My account → School details: some image formats cannot be embedded in the PDF.
I published a schedule by mistake. Open the schedule from the list and click Unpublish. It will go back to draft and stop being visible to families, without losing any data.
I want to stop using a schedule. There is currently no action to delete an entire schedule. If it's no longer valid, the way to retire it is to unpublish it; the time slots you entered are kept.
I copied a day to the rest of the week by mistake. The action replaces the other weekdays' time slots with the source day's. Go back into each affected day and fix or remove the time slots manually; there's no automatic undo.
Frequently asked questions
Do families see every published schedule? Each family sees published schedules with no restricted audience (visible to the whole school) plus schedules with tags that match their student's. If several valid schedules apply to them, they see all of them at once.
Can a schedule apply only to weekends? No. The editor only allows entering time slots from Monday to Friday.
Can a time slot have no end time? Yes. The end time is optional: if you leave it empty, the time slot only shows its start time.
Can publishing be scheduled for a future date? Not directly. The schedule is published the moment you click Publish. If you want it to appear from a specific date, use the Valid from date as the start of validity and publish it whenever you want it to start showing.